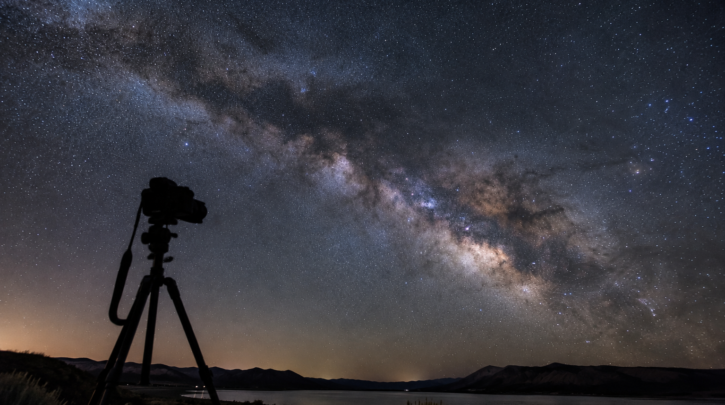

Astrophotography covers a wider range than people expect — from a basic camera on a tripod capturing the Milky Way over a landscape, to a dedicated telescope and cooled camera imaging a faint galaxy over hours. Understanding the different tiers, and what each actually requires, is the fastest way to figure out where you want to start rather than overbuying gear for a goal you haven’t settled on yet.
Tier One: Wide-Field Nightscapes
The simplest starting point is a camera capable of manual exposure control, a sturdy tripod, and a reasonably fast wide-angle lens, used to capture the Milky Way or star fields over a landscape in a single exposure or a small stacked set. No tracking mount is required at this level, which keeps cost and complexity low; see our Milky Way photography guide for exact settings.
Tier Two: Tracked Wide-Field and Piggyback Imaging
Adding a portable star tracker — a small motorized mount that rotates the camera to match Earth’s rotation — allows exposures many times longer than an untracked shot without star trailing, dramatically increasing the detail and color captured in the Milky Way or a wide star field. This tier requires polar alignment (pointing the tracker’s axis at Polaris) and a bit more setup time, but it’s still a relatively affordable step up; see our star tracker guide for models and setup.
Tier Three: Deep-Sky Imaging Through a Telescope
Photographing faint galaxies and nebulae in real detail traditionally means a telescope, a tracking or guided equatorial mount, a dedicated astronomy camera, and image-stacking software to combine dozens or hundreds of exposures into one final image. This is the most rewarding tier in terms of results but also the steepest in cost, setup complexity, and learning curve — collimating a telescope, guiding a mount precisely, and processing stacked data are all skills of their own; see our editing basics guide for what that processing workflow involves.
Tier Four: Smart Telescopes
Smart telescopes compress the entire deep-sky tier into a single device: automated go-to pointing, built-in tracking, and live computational stacking that builds up a bright, detailed image of a galaxy or nebula in minutes rather than requiring separate guiding and post-processing software. Models like the Unistellar eVscope 2 and Odyssey line are essentially a complete deep-sky imaging pipeline in one unit, at a real cost premium over building the equivalent traditional setup yourself; see our smart telescope guide for how they compare to the traditional route.
Core Concepts Worth Understanding Early
- Star trailing — without tracking, exposures beyond a few seconds (depending on focal length) show stars as short streaks rather than points
- Stacking — combining many exposures of the same target increases the signal-to-noise ratio, revealing detail invisible in any single frame
- RAW format — shooting RAW rather than JPEG preserves far more data for adjustment during editing
- Light pollution — your local sky darkness caps what’s realistically achievable at every tier; see our light pollution guide
Where to Actually Start
If you already own a camera capable of manual mode, start with tier one — a tripod and a night with a dark, clear sky costs nothing beyond gear you may already have, and it teaches the core exposure concepts every later tier builds on. If you’d rather skip straight to detailed deep-sky images without the years of traditional learning curve, a smart telescope is a legitimate shortcut, not a lesser path — it’s simply a different tradeoff of cost against time and complexity.
Camera Choice Matters Less Than People Assume
A capable astrophotography setup doesn’t require the newest or most expensive camera body — manual exposure control, RAW capture, and reasonable high-ISO performance are the real requirements, all present on cameras several generations old; see our camera guide for what actually matters when choosing or using one you already own.
Patience Is Part of the Process
Every tier of astrophotography rewards patience over impulse buying — planning around moon phase and Milky Way visibility, waiting out clouds, and accepting that early results will improve with practice rather than gear upgrades alone. The learning curve is real at every tier except the fully automated smart telescopes, and even those benefit from understanding what’s actually happening behind the automation.
A Realistic First-Session Plan
A reasonable first outing: pick a night within a few days of a new moon, check that your camera has manual mode and shoots RAW, bring a tripod, and aim for a wide-field shot of the Milky Way or a bright star field rather than a faint deep-sky target. Success on that first try builds the confidence and basic skill to move into tracked shots or, eventually, deep-sky imaging, rather than starting with the hardest tier and getting discouraged.
Budget Expectations by Tier
| Tier | Typical Starting Cost |
|---|---|
| Wide-field nightscapes | $0-$200 (using a camera you may already own) |
| Tracked wide-field | $300-$600 (adds a star tracker) |
| Traditional deep-sky rig | $1,500-$4,000+ (mount, scope, camera, software) |
| Smart telescope | $2,000-$4,500 (all-in-one) |